First, what is a timelapse?
Timelapse is a form of videography where a video clip shows time moving faster than in real life. Timelapses can either be created by speeding up a recorded video (easy method), or by stitching together many photos in succession (advanced method). Many people are confused as to how photos can be turned into video, but remember that a video is just a series of photos being played back at a high frame rate, usually 24 or 30 frames per second, and because humans have what is called “persistence of vision,” we don’t notice the small gaps between images. Fun fact, humans start noticing frame delays at about 15 fps, but beyond about 240 fps, we can’t tell a difference!
Check out one of my timelapse films here:
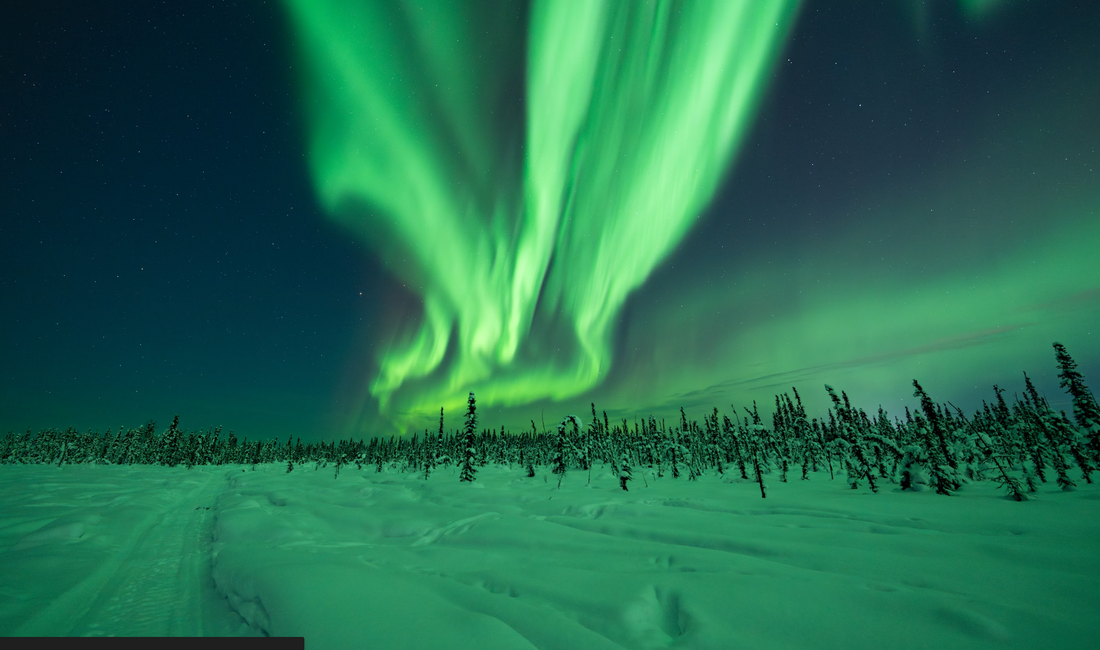
Also, even if you don’t plan on getting serious with timelapse photography, it’s a good approach to shooting auroras because you can set and forget your camera white it captures everything going on. The last thing you want while aurora chasing is to be fiddling with your gear as the aurora dances around you - in my opinion, photography is awesome, but so many times it can taint the real experience of nature. It’s my philosophy that you should ENJOY the auroras for yourself before worrying about capturing photos. Timelapse is the best of both worlds since you know you won’t miss a thing, and if you set up your camera correctly, all your shots should look great.
How do you prepare for and shoot a timelapse?
Gear
You will need four things: a camera, lens, tripod, and intervalometer (either internal or external). A camera, lens, and tripod should be no-brainers, but a wide-angle wide-aperture lens is always my recommendation for aurora photos. Any modern camera, even smartphones, can take great images of the aurora. A tripod is needed to keep the camera still while taking long exposures and so that it won’t move in-between shots. What about an intervalometer? An intervalometer is something that controls the camera’s shutter and can put the camera in a mode where it takes an image every specific number of seconds (interval). For a good timelapse, you want your camera to take images at a constant rate so that when you create a video, it’s not stuttery or jerky-looking. Most modern cameras actually have an intervalometer built-in to the settings menu, but otherwise, you can pick up an external device for less than $30 that plugs into your camera. Just make sure you check the compatibility with your specific camera model.
Settings
Camera settings for aurora timelapses are a little different than in normal aurora photography. How you set your settings is guided by two main principles:- You don’t want to overexpose the aurora - when an image is overexposed (blown out), that data is GONE. Underexposed shots that look too dark actually have image data that can be recovered.
- The aurora can change with time - If you’re an experienced chaser, you know how bright the aurora can get in as little as five or ten minutes. You also might know the patterns of the aurora over a given night (think the substorm cycle) and can anticipate if the aurora should get brighter or darker over the next minutes or hours. This aurora “spidey sense” is another post I will make on here at some point because there are ways to know how the aurora will behave given certain solar wind data, the time of the night, and typical patterns in the structure of the aurora.
That being said, set up your shot for an aurora timelapse as you normally would for an aurora, then bump down your ISO setting by one or two stops so that your image is a bit underexposed. On all my cameras, I use Auto ISO with an Auto EV adjustment of -0.7 so that I can take the guesswork completely out of my settings and ensure that no aurora ends up clipped. Auto ISO is scary to a lot of people, but if you own a camera that was released in the last five years, chances are, it will work great for aurora timelapses. Since camera settings are calculated using your camera's internal metering system, if you own a very entry-level or very old camera, your meter might not work in low light which could cause inaccurate auto ISO adjustments. My advice is to test your camera's Auto ISO on a timelapse of any night scene and examine the final video for flicker. Excessive flicker may be caused by inaccurate ISO adjustments. If you see that, you can either use deflickering software to remove it (which will be covered in a later tutorial) or manually set your ISO.
Then, if the aurora blows up, you won’t be blowing out any image data. Also, in case you didn’t know, ISO does not affect exposure - on almost all modern cameras, adjusting the “Exposure” slider in Lightroom (or another RAW processor) is the same as changing the ISO on your camera - it does nothing to the image being captured except brighten/darken it. So, as long as the data in your images isn’t completely black (underexposed) or completely white (overexposed), your ISO setting basically gives yourself a buffer in case the aurora gets super bright!
Just as a reminder, for auroras, you should use your lens’ maximum aperture (lowest f-number) setting, a shutter speed 2-30 seconds depending on how bright/active the aurora is, and an ISO that makes the image look a bit underexposed (usually 640-3200). Auto ISO also works if your camera can handle metering in low light.
Also, make sure to set your white balance MANUALLY! Auto white balance (AWB) will cause a white balance “flicker” that is basically impossible to correct in post. If you shoot a timelapse with AWB, you’re screwed. Set it to anything you want because it can be adjusted easily in post. It shouldn’t have to be said, but shoot RAW, in manual focus, and without your on-camera flash.
Interval and number of shots
The interval is how we create the timelapse - we need to capture images every ___ seconds so that we can string them together later. If you have a slow SD card and your camera’s buffer fills up quickly, set your interval to your shutter speed + 2 seconds. This will give your camera time to write the photo to your SD card before taking another photo. If you don’t add this delay, your camera’s internal buffer will fill up and start lagging, leading to inconsistent intervals. If you have a modern camera with a fast SD card, then simply set your interval to your shutter speed. This way, there will be no dead time between photos - it’s more time-efficient. How you set up this interval will depend on the type of intervalometer you are using.
The number of shots you should take depends on how long you want the final video to be. I recommend aiming for at least 10 seconds per. Timelapse clip, and I usually play back my videos at 24 or 30 fps (still deciding which one is best). Then, I would aim for at least 300 shots. Most intervalometers will make you specify this number, then calculate the amount of time it will take for the camera to capture all these photos. If you have a long interval (probably because the aurora is weak and you have to use a long shutter speed), this may take an hour, but on active nights when my interval is sometimes 2 seconds, I can hit this 300-shot benchmark in about 10 minutes. The simple equation that governs this logic is video time = number of shots / video frame rate. In my case 10 seconds = 300 shots / 30 shots / second.
Tip:
Avoid headlamps, turning on your car headlights, or walking around in your shot as your camera takes pictures. Even if you only turn on a light for a few seconds, this will show up as an annoying flash in your video which is hard to remove. People moving in a shot can be a cool look, but usually I don’t prefer it. Aurora is the focus, here!
Post-processing
I am going to give you the simple version of how to process aurora timelapses - Adobe Lightroom and Adobe After Effects. I will create more posts on this in the future exploring how to use LRTimelapse, AE plugins, masking, etc., but since this blog is already getting long, I don’t want to write a book here. This should be enough to get your feet wet!
Editing your photos
Once you have captured all your images, load them into Adobe Lightroom. Ideally, the newest “Classic CC” version is the one you are using. Go to the brightest image in your sequence and edit that photo how you'd like. If the aurora is very bright compared to the rest of the images, try to edit the photo so that it is almost overexposed, but not quite. We will be applying the same edits to every photo, so take this into consideration. I will create a whole guide on how to edit aurora images, but I usually only touch exposure, highlights, texture, saturation, and the tone curve. Also, remove any sharpening (Lightroom applies some by default), apply lens corrections, and make sure your horizon is straightened!
Pro tip:
Most people don’t know this, but there are certain sliders in Lightroom that will introduce flicker into your timelapse! These are called “nonlinear” sliders because they don’t apply the same “function” to every image even if you copy and paste the settings over the entire image sequence. Lightroom, instead, looks at each image separately and applies what it thinks is the best edit. Trust me, after hundreds (maybe even thousands) of hours doing timelapsing, this is a legit thing. Basically, Lightroom is not doing what it’s supposed to be doing. Highlights, shadows, contrast, dehaze, and clarity should NOT be adjusted in your timelapse photos, or if you can’t help it, adjusted sparingly. Instead, use texture to increase detail, and use the tone curve to adjust contrast, highlights, and shadows. What about Dehaze? Well, it sucks, because I love dehaze, but for timelapse, it introduces a strange white balance flicker. Some people have had success by changing the color profile from Adobe Color (default) to Camera Standard. This didn’t work for me.
Sync your settings across the entire timelapse sequence, and if you have the Lightroom AI denoise function, use it on each photo. It took me some time to figure this out, but if you highlight the entire sequence of images in the develop module, highlight one image, and hit “Denoise,” it will bing up the dialogue box to adjust the denoise parameters and then batch apply the AI denoise to every image. I have found that the AI denoise in Lightroom is fantastic on still images AND for timelapse - as far as I have seen, there’s no strange flicker or weirdness of the noise processing between images.
Export the whole sequence as JPEGs, or if you want better quality at the expense of processor time and storage, TIFFs. If you want to do anything with HDR, a TIFF vs. JPEG export is a must.
Turning your photos into a video
Open Adobe After Effects (also could use Premiere) and open your timelapse sequence with File→Import→File then navigate to your TIFF or JPEG sequence, highlight the first image, and select “import as JPEG/TIFF sequence.” In After Effects, you will create a new composition from this image sequence, specify the frame rate and image resolution, then export the video through Adobe Media Encoder. You can also use the internal export in After Effects. Also, just a word of warning, in Adobe products, the default frame rate for importing a sequence of images is 30 fps! You can change this in the preferences (Edit→Preferences→Import, then look for “Sequence Footage”). If you don’t do this and you want 24 fps instead of 30, you will actually be getting LESS real-time footage since creating a composition from a 30 fps clip then changing the frame rate in the composition to 24 fps does NOT change the frame rate of the original clip, just the speed at which it plays back… it’s confusing, but I’ve been burned by this oddity before.
These are the best export settings:
Instagram Reels/TikTok/YouTube Shorts: h.264 1080p (1080x1920)
YouTube: High quality h.264. h.265 encoding causes areas with repeated patterns (noise) to appear blocky.
Twitter: h.264 1080p or 4k (can’t be longer than 2:20 unless you have Twitter Blue)
Side note: I have had issues exporting at 4k 9:16 (2160x3840) and loading those clips on my iPhone. I would stick to 1080p vertical videos.
I hope this post was helpful, and if you enjoyed it, export more coming this summer! I have some great ideas planned. If you have any suggestions on what I should write about next, feel free to let me know!

1 comment
This beginner’s guide to creating an Aurora timelapse is incredibly insightful! The step-by-step instructions make it easy for anyone to capture the mesmerizing beauty of the Aurora.
Studio52 is a leading audio-video production company offering timelapse video production services in Kuwait.